 When you look at your own website, statistics programs like Google Analytics will track that as a visit. If you’re constantly working on and monitoring your site, this can really skew the stats, so you need to filter yourself from the results.
In Google Analytics, it’s very easy to exclude your visits. The key is to know the IP address of your devices.
Notice I said “devices” because unless they’re all accessing the internet through the same provider, you’ll have different IPs. In particular, you’ll want the IP of your home devices and your work devices.
IP addresses can change over time, so it’s worth checking your IP every six months or so and updating your filters accordingly.
Luckily, it’s easy to find your IP through sites like whatsmyip.net, but Google’s made it even simpler. Just type in “my ip address” and it’s displayed immediately.
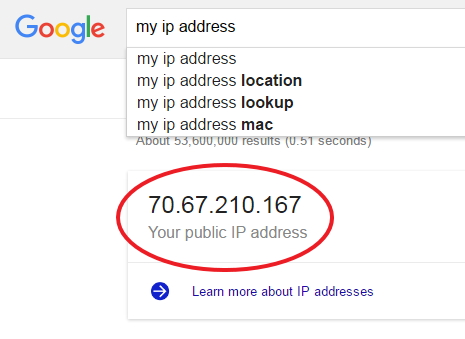
This is known as an IPv4 address, but you may see a very different string of numbers, like this:
2001:0db8:85a3:0000:0000:8a2e:0370:7334
That’s an IPv6, which is a newer type of address that everyone is gradually moving to. Either type of address can be used in Google Analytics filtering, so go ahead and copy and paste the number you get into a text editor like Notepad or TextEdit.
Do the same thing for your work computer or for mobile devices that don’t run off your home network.
Now you need to access your Google Analytics account and choose which website you’re creating the filter for, if you have more than one site.

Then click on the Admin link in the header.
You’ll get a set of three columns and in the right hand column near the bottom you’ll see Filters. Click that link.
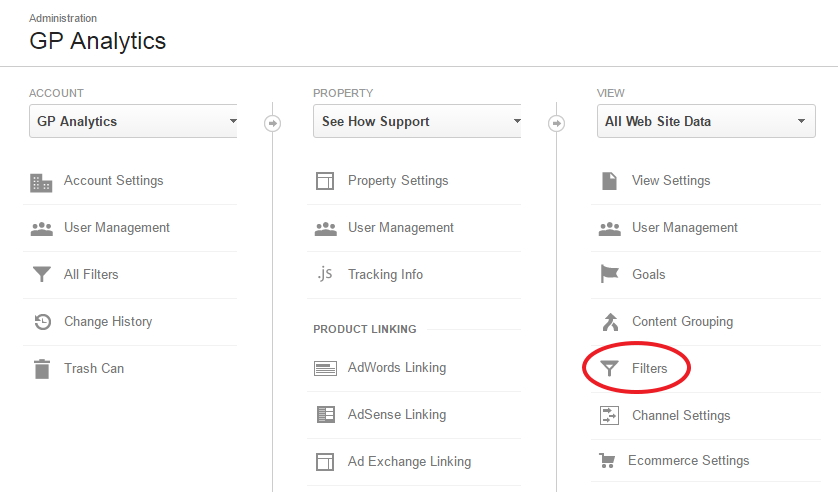
Unless you’ve already created some filters, you’ll see a blank filters list. Click the Add Filter button.

You’ll want to clearly name your filter because you’ll likely have more than one over time. If I had a work or mobile IP, I’d have named this My Home IP Address.
Then under Filter Type make sure it’s on Predefined. For the Select Filter Type drop down, choose Exclude.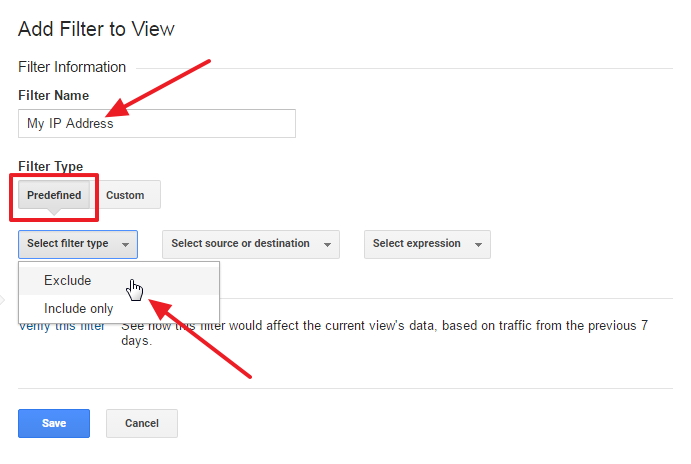
Next you need to Select Source or Destination. In this case the information is about the source of the visitor and you want to choose traffic from the IP addresses.
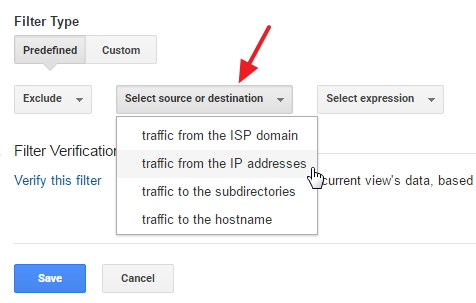
And in the final drop down you want to select that are equal to, then copy and paste your IP address into the IP field.
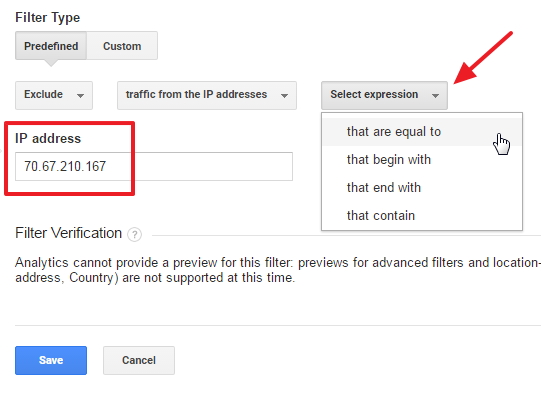
Click Save when you’re all done, and now you’ll see your new filter in the list.

You can test if the filter is working – it might take a few minutes – by going to Real Time reporting and see if you show up in the stats.
If you are showing up, double check your filter settings. In particular, make sure the IP has all its numbers. It’s easy to miss one even when copying and pasting.
This real-time check is also something you should do every few months – if Google’s picking you up, your IP address has probably changed. So check it and add a new filter if it has.
What's Your Take?