As of WordPress 4.3, it became very easy to add a favicon (not to mention mobile icons) to your site, no matter what theme or plugins you have. Built into the Customizer function is a place to upload a single large icon, which WordPress then resizes for several platforms. Just as important, WordPress also adds the proper coding to the head of your pages so that those icons are used properly by each device or browser.
The key is to create an icon that’s 512 pixels by 512 pixels.
Elsewhere I’ve written about the importance of favicons and design considerations, as well as some of the technical requirements. Here I show you how to load the favicon into WordPress.
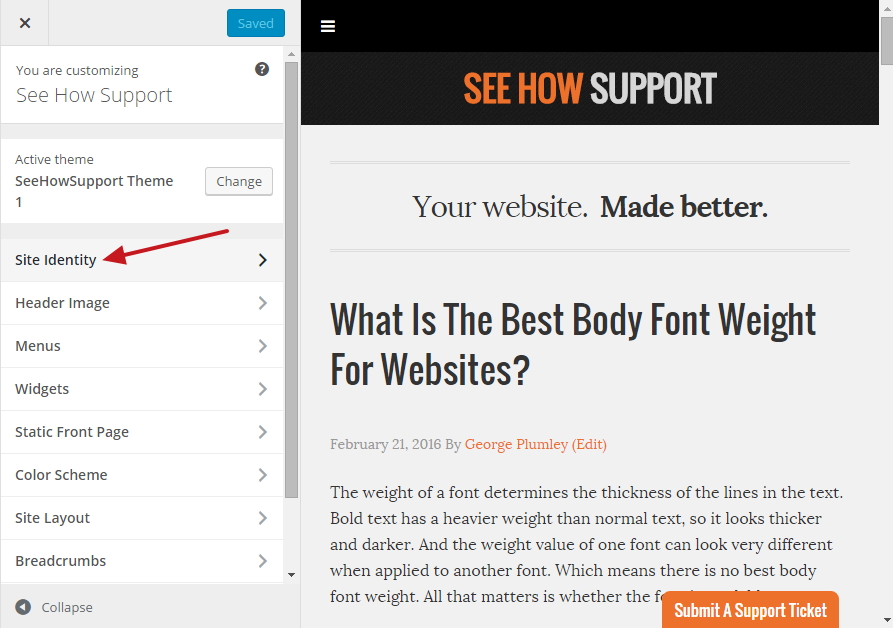
Once you have your image, just log into WordPress and go to Appearance -> Customizer and click on Site Identity:

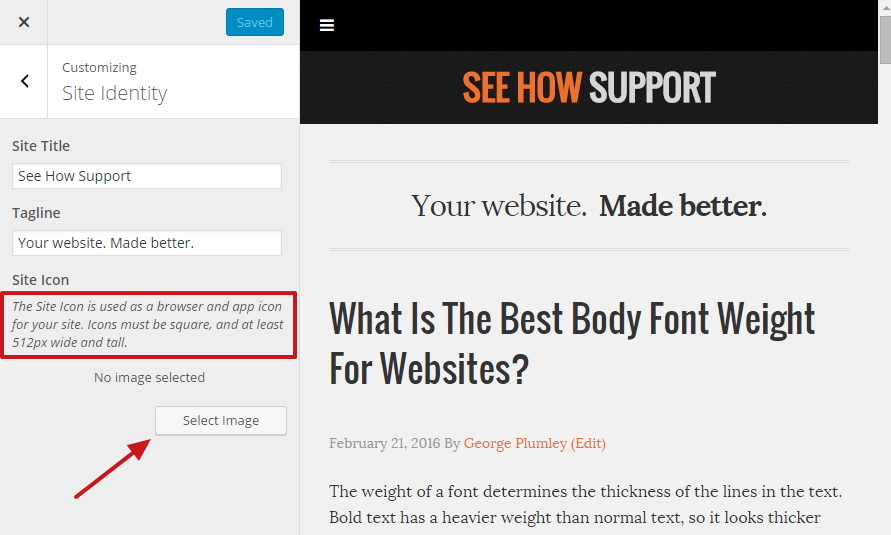
There you’ll find the reminder about the sizing of the image, where it will be used, and a button for selecting the image.

Once you’ve selected your image (either from the media library or by uploading a new image), a popup window allows you to make any final cropping. I would recommend having it all properly sized before you begin the upload process.
You’ll also see what the icon is going to look like in a browser or on a mobile device’s home screen.
![]()
Once you’ve either cropped the image or skipped cropping, the image is uploaded and you’ll see it in the Customizer window.
Remember to Save and Publish.
Now the icon will appear in your browser and other locations using favicons. If you look at the source code of your page, you can see in the head section that WordPress has put in various tags for desktop browsers, including Microsoft browsers, and for Apple devices and other mobile applications.
![]()
If you ever want to change your icon, just repeat the process.
What's Your Take?